Take better pictures with Android cameras
Knowing how to take better pictures with Android cameras is something most people need to learn about. Most people only use the default and most basic settings when taking a picture with their Android phone or tablet. The advanced features that have been added to these Android cameras have made the small camera obsolete. Why buy a camera when my phone will take good pictures?
What can the newer Android cameras do?
The newer Android cameras have features such as zoom, different flash settings, built-in filters, plus a front and back camera to make taking selfies easier. When buying an Android phone, look at the specifications of the camera. It will say how many pixels the camera will do. The back (the camera that points away from you) camera normally has a much higher pixel rating than the front (the camera used for selfies) camera.
The cameras are rated with megapixel numbers. One megapixel equals about one million pixels. A pixel is a small dot in the picture. A picture is composed from millions of pixels (dots) close together. The pixels are in a variety of colors that make up the color picture.
The pixel rating used to be important when the phone camera technology was new. Now the newer phones have cameras with 12MP (megapixel) or higher. You really only need 8MP at the most to get a good picture. 12MP is a good setting if you plan to print poster size prints.
Android Camera App Comparison Chart
Choosing the right camera app for your Android phone can be overwhelming with so many options available. A good camera app is essential to learn how to take better pictures with Android. To help you narrow down your search, I’ve created a comparison chart highlighting some of the most popular apps and their key features:
| Feature | Stock Camera App | Open Camera | ProCam X Lite | Lightroom | VSCO | ProShot | Snapseed |
|---|---|---|---|---|---|---|---|
| Price | Free (pre-installed) | Free | Free | Free (with in-app purchases) | Free (with in-app purchases) | Paid | Free |
| Ease of Use | Very easy | Easy | Easy | Moderate | Moderate | Moderate | Moderate |
| Manual Controls | Limited | Extensive | Extensive | Limited | Limited | Extensive | No |
| RAW Capture | No | Yes | Yes | No | No | Yes | No |
| Photo Editing | Basic | None | Basic | Extensive | Extensive | None | Extensive |
| Video Recording | Basic | Yes | Yes | Yes | Yes | Yes | No |
| Filters & Effects | Limited | None | Basic | Extensive | Extensive | None | Limited |
| Unique Features | None | Timer, gridlines, HDR | Burst mode, timer, gridlines | HDR, panorama, selective adjustments | Film simulations, advanced editing tools | HDR, panorama, timelapse | None |
Here are some additional details to consider:
- Stock Camera App: This is the pre-installed app on your phone and offers a simple interface with basic features like auto-focus, flash, and zoom. It’s a good choice for casual users who want a quick and easy way to take photos.
- Open Camera: This free app is a great option for users who want more control over their camera settings. It offers extensive manual controls, RAW capture, and a variety of other features.
- ProCam X Lite: Another free app with a good balance of manual controls and ease of use. It offers features like HDR, burst mode, and a timer.
- Lightroom: This popular app is known for its powerful photo editing tools, but it also has a decent camera with manual controls and HDR. The free version offers limited features, but the paid subscription unlocks more advanced options.
- VSCO: This app is popular for its high-quality filters and editing tools. It also has a decent camera with basic manual controls. The free version offers a limited selection of filters, but the paid subscription unlocks more.
- ProShot: This paid app is a favorite among professional photographers for its extensive manual controls and RAW capture. It also offers features like HDR, panorama, and timelapse.
- Snapseed: This free app from Google is a powerful photo editor that can be used to edit photos taken with any camera app. It offers a wide range of tools and filters, making it a great choice for those who want to take their photos to the next level.
Ultimately, the best camera app for you depends on your individual needs and preferences. Consider what features are most important to you and try out a few different apps to see which one you like best.
How to take better pictures with Android cameras?
Cameras will differ from manufacture to manufacture, and between Android versions. Here are some general tips to take better pictures with Android camera:
- Flash setting – you can turn it off, set it to automatic so it only flashes when needed, or you can turn it on so it always flashes. The best setting is automatic. However, having the flash on always isn’t a bad idea because it can fill in dark places or shadows in the picture.
- Set the Front or Back camera. If you are taking selfies, you’ll want the front camera enabled. Touch the icon showed below and each time you touch it, the camera will change to Front or Back.
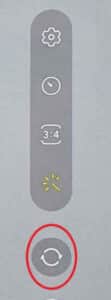
- Choose whether you are taking a portrait, photo or doing a video. If you choose taking a portrait, you have options for blurring the picture to give it a soft look. Touch on More to select other options such as Panorama, Food, Pro, or Hyperlapse. Each option has its own settings.

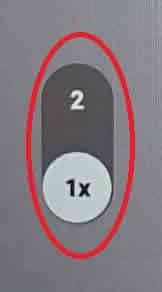
- Select the Zoom setting you want to use. 1X is a normal setting without any zoom. A lower number, such as .5 is a wide angle setting. Each higher number will zoom the photo closer. Some cameras have zoom setting as high as 15X.
- Touch on the Settings icon (gear) to see additional settings that are available for your camera. Make adjustments then try taking a picture to see if you like the changes you made. You can always change the setting back.
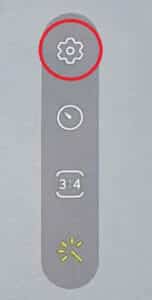
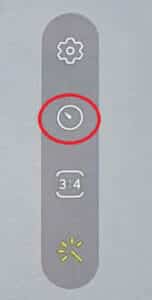
- Most phone cameras have a timer setting so you can set the camera to delay 3, 5 or 10 seconds before it takes the picture. This is handy if you want to set the phone and then move into the picture.
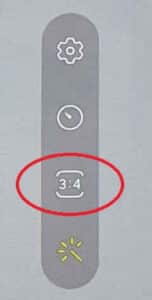
- The Aspect Ratio can be changed to different ratios. the 3:4 ratio is most common, however, you can set the aspect to be much wider, such as 9:16, or more normal 1:1. Different cameras have different aspect ratios that can be selected. The first number represents the width and the second the height of the picture.
- You may choose to add a filter to the picture which can give a better picture of a face, or other options.
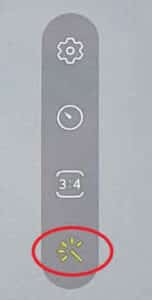
Other options
Some cameras include options for controlling or changing the exposure of the picture. You can set the ISO or Aperture to make the picture brighter or darker. The aperture setting also helps to get the correct focus when using a large zoom setting.
Consider the composition of the picture. Look how the subject is framed. You’ll want the subject to be the center of the frame with not too much sky or ceiling and not too much floor. Also look at the background behind the subject. But sure there isn’t something or someone in the background that will take away from the quality of the picture.
Since you have a digital camera in your phone, take as many shots as you like. Try different things, exposures, filters, zoom, etc. You can easily delete the photos you don’t like.
Frequently Asked Questions (FAQ) about How to take Better Pictures with Android:
General Tips:
Q: Should I use automatic or manual mode?
A: Start with automatic for most situations. If you want more control, explore manual mode when comfortable.
Q: How important is light?
A: Crucial! Natural light is best, but adjust exposure or use flash in low light.
Q: How can I get sharper photos?
A: Hold your phone steady, tap to focus, burst shoot for action, and clean the lens.
Q: What about composition?
A: Use the rule of thirds for balanced shots, pay attention to background, and fill the frame for impact.
Technical Settings:
Q: Should I use HDR?
A: Great for high-contrast scenes, but can look unnatural in some situations.
Q: What about shutter speed and ISO?
A: Play with these in manual mode for faster/slower captures and low-light adjustments.
Q: Can I zoom in without losing quality?
A: Depends on your phone. Digital zoom generally reduces quality, so use optical zoom if available.
Advanced Techniques:
Q: How can I take good portraits?
A: Use portrait mode if available, adjust background blur, and pay attention to lighting and composition.
Q: Can I capture long exposures with my phone?
A: Some camera apps have long exposure modes, useful for light trails or night photography.
Q: What are third-party camera apps?
A: Apps like GCam offer more features and controls than the stock camera app.
Bonus Tips on How to Take Better Pictures with Android:
Edit your photos! Many apps offer basic and advanced editing features to enhance your shots.
Practice makes perfect! Experiment, explore different styles, and have fun learning how your camera works.
Additional helpful information:
There are some very good third-party camera apps available – 10 Best Camera Apps For Android: Shoot Like a Pro
Google Lens is a very interesting app where you can put a image of anything into the frame of the app and Google will tell you about it. Where it can be found, who the person is, etc. You can also point your camera at anything and Google will give you detailed information about it. How to use Google Lens with your Android camera?
When you have many photos on your Android phone or tablet, you need a good app to manage them. Android Photo Manager
Some cameras have an option to connect wirelessly to your phone and then from a downloaded app, you can control the camera from a distance. Control your Camera Remotely from your Android phone
You may take photos on your phone or tablet, but then you want to transfer the photo from one to the other. Transfer photos to Android phones or tablets
Be sure you have a safe backup of your photos and videos. You never know when your phone will die and you may loose all your photos. How to backup photos and videos on Android?


